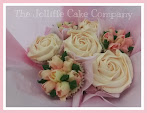
You can make some beautiful blossoms using the new Blossom Spellbinder Nestabilities.
I use my Sizzix big shot, which requires you to
Firstly add the un-opened multipurpose platform on the Sizzix, then add your chosen dies, ridges up! i used sizes (1 being the largest die) 2,3,4 & 5 ( optional)
On top of these place your chosen card, then the two acylic mats on top of your card.
Run these through your machine.
And leave the cutout shapes in the dies on the platform
Then add the two silicone/rubber mats, a shim ( folded piece of paper or i find and envelope the right thickness) on top and on top of it all one acrylic mat, then re-run through your machine.
Remove you cutout blossoms and the die onto a Creative Expressions non-stick Craft sheet
Then using an Adirondack ink pad and a square of wet & dry pad,
rub the ink around the edge of the die onto the blossom, in a swirling motion, this will just shade the centre of the blossom.
Repeat for all the other sizes.
Then cut into each blossom to roughly a cm from the centre, to give the blossom petals, this doesnt have to be exact.
Using a boning tool curl the individual petals to make the blossom into a cup shape.
Glue the blossom layers together with a wet glue, leaving to dry, then you can cup the flower in your hand and dress the flower to your desired shape.
Depending on what card you use you can get some great effects!
At this point you can just add a brad and attach to a card, hairband, bag etc or if you cut out the smallest die,
colour but dont cut the blossom and just cup in the palm of your hand using a large ball embossing tool, then glue to the centre of your blossom and add I then added a large blob of Crystal Stickles.


2 comments:
Great tute Nicola but where did you find the time?
xx
Thank you for the tutorial. :-) xx
Post a Comment